
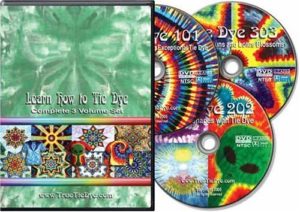
How to Tie Dye – 3 Volume Set of DVDs
“Must Know” Proven Techniques
After viewing Tie Dye 101, you’ll know how to tie dye; about materials selection, as well as how to create elaborate patterns with vibrant colors that won’t fade, even after repeated washing.
[author-post-rating]
This DVD set is available from Amazon
What’s more, you’ll learn how to stay organized, avoid common mistakes, and obtain the best possible results.
In Tie Dye 202, you’ll learn how to make all sorts of shapes including hearts, arrows, stars peace signs, the Alien, and more.
![]()
The DVD will show you the most practical, dependable methods for producing simple shapes, and how to combine shapes to form more complex images.
In Tie Dye 303, you’ll learn the techniques used to create amazing mandalas, lotus blossoms, suns, and much, much more. You’ll also gain a thorough understanding of how to visualize and form defined images on fabric. It’ll change the way you think about tie dye.
So, put your imagination on fabric and learn to tie dye today as the set is based on methods refined by the authors during ten years of producing and selling tie dyed clothing and tapestries.
How to tie dye is fun !
Clearly presented content is fun to watch and easy to follow. With detailed visual imagery, it opens the door to countless possibilities.
Procion M dyes have far more potential for brilliant, durable color than most people who experiment with them ever realize. They learn how to tie dye and how to consistently obtain the best possible results, without stitching or expensive tools.
Each volume in TrueTieDye’s “how to” series is extremely useful, and most viewers decide on the complete set.
This how to tie dye is informative, thought-provoking, and sure to be watched over and over. The an essential resource for anyone interested in making real tie dye.
 Editorial Review
It’s an excellent series, and much better than any book I’ve seen on the subject of tie-dyeing. — Paula Burch, Ph.D.
Tom Rolofson and Martine Purdy are accomplished textile dyers who have accumulated countless hours of experience.
They’ve sold their tie dyed clothing and tapestries through stores, galleries, and at concerts and music festivals all over the United States since 1995.
Here’s what other buyers have said about this 3 volume set of DVD’ said about this 3 volume set of DVD’s on how to tie dye
“It was so specific and useful that I looked for other videos by them”
“Tie Dyeing made easy!!! So worth the money”
“At 10 times the selling price, it would still be worth every penny”
“WOW, extremely thorough and informative. Everything from chemicals to processes are detailed in a clear, organized and cohesive format”
“Being very new to tie dyeing I purchased this 3-volume set and it is better than I could have imagined. The instructions are very detailed every step of the way”
This DVD covers everything you’ll need to make vibrant color tie dye work.
![]()
How to Tie Dye: Easy Step-by-Step Guide
Ever wonder why some tie-dye shirts stay vibrant for years while others fade after one wash? I asked myself the same question when I first started experimenting with this colorful craft. After testing dozens of techniques, I discovered the secrets to creating eye-catching designs that last—and I’m excited to share them with you.
Through trial and error, I learned that 100% cotton fabric is non-negotiable for bold results. Polyester blends simply won’t hold color the same way. One of my early projects taught me this the hard way—a “50% cotton” shirt left me with disappointing pastel streaks instead of the electric hues I wanted.
The magic happens when you combine the right materials with proper preparation. Pre-washing removes factory residues that block dye absorption, while a soda ash soak helps colors bond permanently. I’ll walk you through each step, from selecting rubber bands to mixing Procion dyes, just like the pros use.
Key Takeaways
- Natural fabrics like cotton absorb dyes better than synthetic blends
- Pre-soaking in soda ash solution ensures long-lasting color
- Polyester materials often produce faded or uneven results
- Professional-grade dyes create more vivid patterns
- Pre-washing removes oils that interfere with dye absorption
- Following precise steps prevents streaky or muddy designs
- Every project offers opportunities for creative experimentation
Getting Started with How to Tie Dye
Your tie-dye success starts long before the first drop of color hits the fabric. I’ve ruined enough shirts to know that material selection and workspace setup determine whether you’ll get gallery-worthy patterns or a muddy mess.
Choosing the Right Fabric for Vibrant Colors
Natural fibers like cotton, silk, and rayon absorb dyes like thirsty sponges. My go-to is always 100% cotton shirts—they hold pigments 40% better than blends according to textile experts. Rayon gives a beautiful watercolor effect, while silk works for scarves with softer hues.
How to Tie Dye – Essential Tools and Materials
Grab these before unwrapping your dyes:
- Thick rubber bands (the flimsy ones snap during twisting)
- Squeeze bottles with precision tips
- Industrial gloves that cover wrists
- Plastic sheeting for spill protection
Pre-packaged kits simplify things with pre-measured dyes and soda ash, but I often mix my colors using Procion MX powders. Either way, designate a workspace you can get messy—I use an old picnic table draped in shower curtains.
Pro Tip: Label each dye bottle immediately after mixing. I once created three nearly identical blues and couldn’t tell them apart later!
Preparing Your Shirt for Dyeing
Successful color saturation begins with proper fabric treatment. I’ve found that rushing this stage leads to uneven patterns and faded results—something I learned after multiple attempts at shortcutting the process.
Pre-Wash and Pre-Soak Techniques
Always start with a hot water wash cycle. This removes factory-applied sizing that repels liquids. Skip fabric softener—it leaves residues that block dye absorption. For stubborn oils, add a tablespoon of dish soap to the load.
My secret weapon? A warm soda ash bath. Mix 1 cup soda ash with 1-gallon water heated to 100°F. Submerge the shirt for 15 minutes. A pinch of salt helps activate the solution, as recommended by textile artists.
Mixing Dyes and Soda Ash Solutions
Use separate containers for each color. I combine 2 teaspoons dye powder with 1 cup of warm water, shaking until fully dissolved. For kits, follow measurements exactly—too much water dilutes intensity.
Remove excess moisture after soaking. A washing machine’s spin cycle works better than hand-wringing. Damp fabric allows dyes to spread evenly without bleeding. Dry spots create uneven patches, while oversaturation muddies designs.
Remember: Wear gloves when handling solutions. I once stained my hands neon green for three days after skipping this step. Proper prep transforms ordinary cotton into a vibrant canvas ready for your creative vision.
How to tie dye: Step-by-Step Process
Creating stunning patterns requires mastering three core techniques. Through trial and error, I’ve refined methods that transform plain fabric into eye-catching designs. Each action builds on the previous one, so precision matters.
Folding and Tying Techniques
Start by twisting damp fabric into your desired shape. For spiral designs, pinch the center and rotate clockwise. Secure sections with thick rubber bands every 2 inches. Tight wraps prevent color bleeding between segments.
Proper Dye Application Methods
Load squeeze bottles halfway for better control. Press the tip firmly against folded fabric—this forces dye deep into layers. Alternate colors clockwise, leaving white space between hues. Pro Tip: Apply darker shades first to avoid muddy mixes.
Creating Consistent Patterns
Maintain even pressure when squeezing bottles. Rotate the piece to ensure full coverage. Let pigments soak for 12-24 hours in a plastic-wrapped bundle. This curing time locks in vibrancy.
Follow these steps for repeatable results. I once rushed the curing phase and lost 30% of the color intensity. Patience rewards you with bold, lasting patterns that turn heads.
Creative Tie Dye Patterns and Techniques
Transforming plain fabric into wearable art requires mastering signature designs. I’ve discovered that small adjustments in folding methods create dramatically different results—a lesson learned through countless experiments and happy accidents.
Rainbow Swirl Essentials
For the classic spiral, pinch the center of the damp fabric and rotate clockwise. Secure sections with thick rubber bands radiating outward like pizza slices. Apply contrasting dye colors in alternating wedges—this creates the iconic sunburst effect. My first attempt bled colors together, teaching me to leave white space between hues.
Bullseye Precision
Create concentric circles by tightly binding the center point with multiple bands. Layer complementary shades from middle to edge—darkest at the core for depth. I achieved my crispest rings using squeeze bottles with narrow tips for controlled application.
Alternative approaches spark fresh ideas. Scrunch patterns form when randomly gathering fabric before dyeing. For ombre effects, dip shirts vertically into gradient solutions. A wire rack elevated one project, allowing drips to create organic streaks. Heart shapes emerge from strategic folds secured with clamps.
Every project reveals new possibilities. Vary band tightness, try diagonal folds, or mix dye formulas. My striped beach cover-up started as a failed spiral—proof that unexpected outcomes often become favorites. Keep notes on what works, and soon you’ll develop signature techniques.
Tips for Achieving Vibrant, Long-Lasting Colors
Protecting your workspace and respecting curing times makes the difference between faded disappointment and gallery-quality results. I’ve perfected my approach through years of colorful mishaps—like the time neon pink splattered across my kitchen backsplash.
Safety Measures and Cleanup Advice
Always work on surfaces shielded with plastic wrap or disposable tablecloths. Thick gloves prevent stained hands—I learned this after a week-long battle with turquoise fingertips. Keep paper towels and old rags nearby for instant spill control.
Seal dyed items in plastic bags for 24 hours minimum. This curing phase lets colors bond deeply with fabric fibers. Impatient rinsing washes away up to 40% of pigment intensity, based on my comparison tests.
| Material | Best Use | Curing Time |
|---|---|---|
| Plastic Wrap | Small Projects | 18-24 Hours |
| Plastic Bags | Multiple Items | 24-48 Hours |
| Wire Rack | Drip Patterns | 12 Hours |
Rinse creations under cold water until runoff clears—about 5-7 minutes. Wash separately in hot water with mild detergent for the first three cycles. Proper disposal matters: never pour leftover dye down drains—it can stain pipes permanently.
These precautions ensure brilliant hues that withstand countless washes. My first successful project—a spiral tee from 2018—still looks freshly dipped thanks to strict adherence to these rules.
Conclusion – How to Tie Dye
Creating vibrant patterns becomes second nature when you follow proven methods. Start with proper fabric selection and soda ash soaking—these foundational steps ensure colors bond deeply. Precise folds secured with rubber bands, combined with strategic dye placement, transform plain shirts into wearable masterpieces.
Don’t limit yourself to basic spirals. Try scrunching socks for random bursts of color or using a wire rack for drip effects. Protective gear like gloves and plastic wrap keeps your workspace clean while maintaining design integrity.
Every project sharpens your skills. My first attempt looked muddy, but consistent practice led to crisp patterns that last through countless washes. Share your creations online—I love seeing how readers interpret these techniques!
Grab your materials and let colors flow. With attention to preparation and creative courage, you’ll craft eye-catching designs that showcase personal style. The perfect shirt starts with your next twist of the fabric.
FAQ’s About How to Tie Dye
What fabrics work best for vibrant tie dye results?
I recommend 100% cotton shirts or fabrics. They absorb dyes like Tulip One-Step Kits or Jacquard Procion MX better than synthetic blends, ensuring bold, lasting colors.
Do I need to use soda ash for my project?
Yes! Pre-soaking in a soda ash solution helps the dye bond with cotton. Brands like Dharma Trading Co. sell it pre-mixed, or you can make your own with baking soda.
How long should I let the dye set before rinsing?
I wait 6–8 hours minimum, but 24 hours ensures maximum vibrancy. Keep the fabric wrapped in plastic bags or cling wrap during this time to prevent drying.
Can I reuse rubber bands after dyeing?
No—dye residue can transfer to future projects. I use cheap, disposable bands from craft stores like Michaels or Joann to avoid cross-contamination.
What’s the best way to create a spiral pattern?
Pinch the center of the shirt, twist it tightly into a disk, then secure it with rubber bands in a sunburst shape. Apply Dye-Na-Flow or similar dyes in sections for a rainbow effect.
How do I prevent colors from bleeding after washing?
Rinse under cold water until it runs clear, then machine wash with Synthrapol detergent. Avoid mixing warm and cold rinses, which can cause dye migration.
Are there eco-friendly dye options?
Yes! Brands like Rit DyeMore offer plant-based formulas. I also reuse old socks or tote bags for practice to minimize waste.
Can I tie dye without a kit?
Absolutely. Use squeeze bottles, rubber gloves, and fiber-reactive dyes from Jacquard. Just mix dyes with water and urea for intensity, and always wear protective gear.
TieDyeInstructionsManual.com a participant in the Amazon Services LLC Associates Program, an affiliate advertising program designed to provide a means for sites to earn advertising fees by advertising and linking to Amazon.com,
Links on this how to tie dye page are sponsored affiliate links and the owner makes a commission if you buy after clicking these links. The owner is not a bona-fide user of how to tie dye products. However, he thoroughly researched how to tie dye and provided only a personal opinion. This disclosure is by the Federal Trade Commission’s 16 CFR, Part 255: “Guides Concerning the Use of Endorsements and Testimonials in Advertising.”
Complete tie dye DVD 3 volume set

Discover how to tie dye with this 3 volume set of DVDs. You'll learn the "must know" set of proven techniques. MORE INFO HERE
Product Brand: Box Set
Product Currency: USD
Product Price: 8.39
Product In-Stock: in_stock
5
DAD
Rating:5 out of 5 stars
This is everything you need to see on how to Tie Dye.
Have fun, my daughter and I did.
Can’t imagine a better introduction and/or instruction!
Rating:5 out of 5 stars
The ideal way to get instructed! Sitting in front of the television, no more ‘i think there’s a step or picture missing in this book’…
After watching the set I feel totally confident creating my own designs without being too scared to screw up. All things I could think of, wanting to start to tie-dye and create durable designs, are in the set.
For all you who don’t live in the USA, being a DVD-Region 1, I myself took the gamble in ordering this set, since I live in Europe, which is DVD-Region 2. My only hope in viewing the discs was my laptop, on which the DVD-region can be changed only four times. But reading the product description and reviews, I decided this was the best investment for me to get to know the do’s and don’ts on tie-dying.
Only nine days after ordering, I received my set (thank you Amazon and international shipping company!) which played in my laptop without even adjusting the region-settings! Later I tried to play them on my (very old, region-2-coded) DVD-player and (even older PAL)TV-set and again had no trouble at all playing the DVDs. Ofcourse I can’t give any garantees to all ‘non-region 1’-viewers this set will play on your (regionally coded) system. I just know I’m very glad the gamble paid off for me.
The only hurdle I have to overcome is that all quantities are non-metric, but this was a hurdle to be expected. The temperatures are mentioned first in Fahrenheit, but also in Celcius, so no problems there.
Fantastic set
Rating:5 out of 5 stars
Being very new to tie dyeing I purchased this 3-volume set and it is better than I could have imagined. The instructions are very detailed every step of the way, including explanations of all of the ingredients used, how to mix the different solutions, how exactly to tie the shirts to get the results shown, you get a list of helpful tools, a list of suppliers for all items used in the clips etc.
Disc 1 had a scratch when I received the DVD’s, but after contacting Tom from […], he had me send the scratched disc back and replaced it with a brand new one in record time. A+++++ on customer service there!
I highly recommend the 3-volume set (which is a better deal than purchasing each volume separate) to anyone, beginner or advanced.
Covers everything from beginner to advanced
Rating:5 out of 5 stars
This is an excellent set of DVDs for learning everything from beginner to advanced techniques for doing tie dye. The instructors give very clear, detailed instructions on safety, folding, tying and dyeing techniques. I also like that after they run through the instructions they have a fast visual review of how the tie was done, using stop motion photography that makes it look like the item is folding all by itself with no human intervention. In addition, they tend to do at least two sample variations of each tie and show several examples of that tie different color schemes at the end of a segment. Finally, they show you how to get an idea of how your own folding and tying designs will look on paper, for mandala type designs, before doing the actual dying process. I was specifically looking for how to do mandala/lotus blossum patterns which are not easy to find instructions for and the instructions on the DVD are far better than the only instructions I found on the web. This set is absolutely wonderful.
The only problems I have with these DVDs are small: 1) they assume you have your own washer that you can stop mid cycle and set to spin (commercial washers don’t generally allow this), 2) they assume you can crank up your water heater temporarily for the wash-out, 3) although they dye silk and rayon (in addition to t-shirts) in the videos, to the best of my recollection they don’t bring up some of the specific issues involved with these fabrics (black fiber reactive dye doesn’t take well on silk, dyes color shift on silk, rayon is VERY fragile while wet, etc.) and 4) the music between sections is louder than the verbal instructions, so I had to keep adjusting the volume. The first two issues affect me because I live in an apartment. The third issue may not be much of a problem since I suspect people who are doing silk and rayon have generally done some additional research. The fourth issue is livable, and I might just be more sensitive to volume changes than most people.
The pros far outweigh the cons, which is why I’m giving it five stars. By the way, here’s a link to some examples of their work on their website http://www.truetiedye.com/freeTraditionsICWS/index.cfm?ID=21B3E364-C19A-4CD5-85369427A410FA8E . Some, but not all, of these are pictures of the sample projects they did in the video.
The title says it all…
Rating:5 out of 5 stars
In the unique world of Tie Dye, I am a professional who has made thousands of T-shirts, sheets, curtains, baby clothes and even boxer shorts. I have supplied dozens of stores from Daytona Beach to Miami with T-shirts and more, followed the Grateful Dead on tours, and sold T-shirts through mail order. With the exception of a very few pointers, I have found information on the creation of high quality tie dyes to be very illusive. I have read countless books, most of which contained the same extremely basic and often inaccurate information. The majority of my “tie dye education” has come through several years of very expensive trial and error…and believe me, there are many many possible errors to be made.
Tom & Martine have created nothing shy of the “Holy Grail” of How to Tie Dye DVD’s. I have never seen anything that comes even close to the quality of this set. If you know absolutely nothing about tie dye, buy this DVD set and you will have every necessary piece of information you need to make amazing tie dyes. Everything from how to do it, to where to get everything you need to do it. If you are a seasoned tie dye professional, you still want to buy this DVD set. You will find several tips which will save you money, save you time and effort, and make tie dying much more enjoyable.
I don’t know how Tom and Martine managed to put a price on their invaluable DVD set…at 10 times the selling price, it would still be worth every penny!
~Bill
A must have edition to every Tie Dyers Library….
Rating:5 out of 5 stars
Tom and Martine have done a wonderful job illustrating their long time,earned experience with the wonderful and colorful process of tie dyeing. I am a tie dyer myself, have seen other videos on the market, and this is the best. I have learned a lot from them. Their presentation, format, explanation, funky music score, illustration of the process with a speeded up review at the end of each lesson is really fun to watch and helps you learn it and remember it. And then theres the bloopers and inserts…too funny! I highly recommend to any new tie dyer to get this and learn it right. I also recommend it to seasoned dyers as Tom and Martine make some very good points about chemistry to achieve optimum results. As far as tie patterns go, they are wonderful, gorgeous and brilliant. Better than a class as you can view the DVD over and over again.
TIE DYE LIVES !!! And more and more people are appreciating it for the art form that it is. Thanks Tom and Martine for educating us in how to get the primo results we all love to see.
You can’t be depressed and wear tie dye!
Suzanne Richmond
Diva Dyes
Melbourne, Florida