
Tie Dye Ideas Inspiration: Fun Ideas for Everyone
What if your old t-shirts could transform into wearable art in under an hour? When I first dipped my hands into colorful fabric projects, I never imagined how addictive crafting vibrant patterns could be. Let me share the secrets I’ve learned—from basic folds to eye-catching spirals—that’ll turn your plain shirts into masterpieces.
I still remember my first crumple design: a messy kitchen experiment that became my favorite hoodie. Now, I’ll walk you through 10 playful techniques, including bullseye and advanced geometric styles. You’ll learn why choosing fiber-reactive colors matters and how pre-washing fabric ensures lasting brilliance.
This isn’t just nostalgia—modern creators are reinventing this craft daily. Whether you’re revamping faded jeans or crafting gifts, these methods work on any cotton piece. Ready to make something unforgettable? Let’s dive in!
Key Takeaways
- Discover timeless patterns like spirals and bullseyes that suit all skill levels
- Learn why proper fabric preparation doubles your design’s longevity
- Explore professional-grade techniques using affordable materials
- Unleash creativity with color combinations that pop on shirts and home textiles
- Master folding tricks that create stunning visual effects in minutes
Introduction to the World of Tie Dye
Few art forms blend spontaneity and structure like tie dye. While trends come and go, this craft thrives because it turns ordinary fabric into a canvas for endless creativity. My first project—a splotchy rainbow shirt—taught me that imperfection often births the most striking designs.
What Makes Tie Dye Timeless?
Bold patterns and eye-catching colors never lose their charm. I’ve found that simple folds secured with rubber bands create mesmerizing results every time. According to textile experts, fiber-reactive dyes bond best with natural fibers like cotton, ensuring hues stay vivid through countless washes.
Here’s a quick comparison of popular methods:
| Technique | Materials Needed | Skill Level |
|---|---|---|
| Spiral | Rubber bands, squirt bottles | Beginner |
| Bullseye | String, plastic wrap | Intermediate |
| Ombre | Dye bath, gloves | Advanced |
My Journey with Tie Dye
I started with thrifted shirts and basic dye kits. Through trial and error, I learned to pre-soak fabric in a soda ash solution—this simple step makes colors pop. My workspace? A folding table covered in old towels. Remember: dedicated areas prevent dye mishaps!
While outcomes can surprise you, these tricks boost consistency:
- Twist tighter for sharper lines
- Let pieces cure for 8-24 hours
- Rinse until water runs clear
Now that you’ve seen the basics, let’s explore the materials in Section 3. Trust me—the right supplies make all the difference.
Essential Materials and Fabric Preparation
Gathering quality materials transforms messy experiments into gallery-worthy pieces. Through trial and error, I’ve learned that fabric prep and dye selection make or break your project’s success.
Choosing the Right Dye and Supplies
Fiber-reactive dyes create intense colors that outlast cheaper alternatives. My go-to? Tulip One-Step kits—they include pre-mixed dye and soda ash for simplified techniques. For custom palettes, mix powdered dyes in squeeze bottles using fabric-safe ratios.
Natural fibers like cotton absorb hues best. I pre-soak every garment in soda ash solution—this step locks in vibrancy. As textile artist Lila Chen notes:
“Proper preparation turns $5 shirts into heirloom-quality art.”
Essential toolkit checklist:
| Material | Purpose | Budget Tip |
|---|---|---|
| Rubber bands | Creating patterns | Reuse hair ties |
| Soda ash | Color fixation | Buy in bulk |
| Plastic sheeting | Workspace protection | Use trash bags |
Set up your diy station outdoors or over washable surfaces. Watch professional process videos to master mixing—the right consistency prevents blotchy results. With these basics, you’re ready to craft designs that wow.
Basic Techniques and Safety Tips for a Successful Project
Mastering the fundamentals transforms chaotic color splashes into intentional art. Whether revamping a shirt or crafting new home decor, precise folding and strategic bands determine your design’s clarity. Let’s break down methods that guarantee crisp patterns every time.
Understanding Folding and Banding
Start with clean, damp fabric—it holds folds better. The accordion technique creates parallel stripes: fold fabric back-and-forth like a paper fan. For organic textures, scrunch material randomly before wrapping bands tightly.
Key principles I swear by:
- Twist spiral patterns clockwise for uniform swirls
- Use thicker rubber bands for bold lines
- Double-wrap areas needing sharp color separation
Cardboard inserts prevent dye bleed-through on layered sections. Watch tutorials demonstrating the process—seeing expert hands manipulate fabric clarifies complex folding methods.
Protecting Yourself and Your Workspace
Safety starts before you uncap a single dye bottle. I always wear nitrile gloves—latex rips mid-project. Cover surfaces with plastic sheeting; dollar store shower curtains work perfectly.
| Item | Purpose | Pro Tip |
|---|---|---|
| Apron | Clothes protection | Use old button-ups |
| Ventilation | Fume control | Work near open windows |
| Paper towels | Quick cleanups | Keep within arm’s reach |
Rinse dyed items separately to avoid staining sinks. Store mixed dyes in labeled containers—this prevents accidental spills. With these precautions, you’ll focus on creativity, not cleanup!
My Favorite Tie Dye Ideas
The magic of transforming plain fabric into vibrant art never gets old for me. Through countless experiments, I’ve discovered combinations that make ordinary textiles unforgettable. Let me walk you through the approaches that fuel my passion for colorful designs.
Inspiration Behind My Designs
Nature often sparks my best patterns. A crumpled leaf inspired my signature crumple technique—random folds create organic textures. I adjust folds slightly each time, ensuring no two pieces look identical.
This table shows my top inspirations:
| Inspiration Source | Technique | Visual Effect |
|---|---|---|
| Sunset gradients | Ombre dye layering | Smooth transitions |
| Stained glass | Bullseye with black outlines | Graphic contrast |
| Marble surfaces | Ice dyeing | Vein-like details |
Combining Colors for Standout Patterns
Bold colors demand smart pairings. I pair electric blue with mustard yellow for striking contrast, or blend raspberry and coral for subtle warmth. Textile artist Marco Reyes advises:
“Limit palettes to 3-4 hues—too many compete for attention.”
Rainbow patterns work best with careful spacing. Apply red and orange first, then alternate cool tones. Remember: dye intensifies as it sets. Start lighter, add depth gradually.
Trust your instincts when experimenting. My favorite hoodie began as a “failed” green-blue mix that morphed into ocean waves. Now it’s my most complimented piece!
Step-by-Step Guide to Popular Tie Dye Patterns
Three techniques dominate my workshop—spiral energy, organic crumples, and bold bullseyes. Each method offers distinct visual rewards when mastered. Let’s walk through the exact process I use to create gallery-worthy designs every time.
Spiral, Crumple, and Bullseye Explained
Start with a damp cotton shirt laid flat. For spirals: pinch the center, and twist clockwise until the fabric forms a tight disk. Secure with 6-8 rubber bands crossing at angles. Apply dye to each wedge—this creates the classic sunburst pattern.
Crumple techniques thrive on chaos. Randomly scrunch fabric into a ball, then wrap the string around it. The tighter the bundle, the sharper the lines. Bullseyes demand precision: fold concentric circles, pinching each layer upward before binding.
| Pattern | Key Tools | Pro Tip |
|---|---|---|
| Spiral | Rubber bands, squeeze bottles | Rotate while twisting |
| Crumple | String, spray bottle | Shake bundle before dyeing |
| Bullseye | Plastic wrap, clips | Alternate warm/cool hues |
Practical Tips and Tricks
Double-wrap rubber bands near edges to prevent bleed-through. As textile instructor Gina Patel advises:
“Treat folds like origami—crisp creases make professional-grade designs.”
- Let dyed pieces cure for 12 hours minimum
- Rinse in cold water until runs clear
- Wash separately first 3-5 years
Achieving Consistent Results
Mark fold lines with chalk for repeatable patterns. I photograph each shirt before dye application—this helps replicate favorite techniques. Track mixing ratios and curing times in a notebook for predictable results.
Patience pays: rushing the rinsing process muddies colors. Remember—every “mistake” is just a new design opportunity waiting to happen!
Creating Striking Patterns: Stripes, Ombre, and Chevron Effects
Precision meets boldness when crafting striped, gradient, and geometric patterns. These three styles let you control outcomes while leaving room for creative surprises. I’ve used them to revive faded curtains, breathe life into denim jackets, and design statement pillowcases.
Mastering Accordion Folds for Stripes
Sharp stripes start with disciplined folding. Lay your shirt flat, then fold it vertically like a paper fan. Secure every 2 inches with rubber bands—the more sections you create, the thinner the lines. Alternate warm and cool colors between folds for rainbow contrasts that pop.
| Pattern | Tools | Key Tip |
|---|---|---|
| Stripes | Ruler, thick bands | Press folds with iron |
| Ombre | Dye bath, tongs | Dip fabric in 3 stages |
| Chevron | Triangle template | Stitch guide threads |
Tips for Ombre and Chevron Techniques
For smooth ombre, mix dye in a tall container. Dip the fabric vertically, lifting it higher every 5 minutes. Textile artist Nina Torres recommends:
“Maintain a 1:3 dye-to-water ratio—too concentrated creates harsh lines.”
Chevrons demand angular precision. Fold material into zigzags, then clamp with wooden boards before applying dye. This table shows my setup for crisp Vs:
| Step | Action | Result |
|---|---|---|
| 1 | Mark angles with chalk | Consistent folds |
| 2 | Apply resist paste | Sharp edges |
| 3 | Layer analogous hues | Depth illusion |
Adjust saturation by spraying water on looser folds—diluted areas absorb less pigment. Whether refreshing tablecloths or making concert tees, these methods adapt to any project. Now go twist, dip, and angle your way to head-turning designs!
Advanced Folding Techniques for Mandala and Shibori Designs
Elevating fabric art requires precision folding methods that challenge even seasoned creators. I discovered that mandala patterns and Japanese-inspired shibori folds unlock geometric wonders when executed with surgical accuracy. Let me guide you through methods that turn basic tees into gallery pieces.
Designing a Tie Dye Mandala
Start with a damp cotton shirt laid flat. Fold vertically into 8 sections like slicing a pie, using cardboard wedges to maintain sharp creases. The pinch small method involves gripping 1/4-inch segments—this creates intricate radial symmetry.
Key steps for kaleidoscope effects:
- Mark the center with chalk for alignment
- Alternate tight and loose folds for texture contrast
- Apply dye to alternating sections with squeeze bottles
Exploring Shibori-Inspired Folds
Shibori’s organic shapes thrive on controlled chaos. I fold the fabric into triangles, then clamp wooden blocks over strategic areas. Textile artist Hiro Tanaka advises:
“Resist techniques create negative space that breathes life into designs.”
| Technique | Tools | Result |
|---|---|---|
| Itajime | Wooden shapes | Angular patterns |
| Arashi | PVC pipe | Diagonal stripes |
| Nui | Needle/thread | Stitched textures |
My first shibori attempt bled colors, but adjusting fold pressure solved it. These methods demand patience—allow 24 hours curing time. With practice, you’ll craft museum-worthy pieces that stun viewers.
Innovative Approaches to Tie Dye for Apparel and Decor
Breathing new life into forgotten textiles combines creativity with eco-conscious living. My favorite thrift store finds—stained shirts, faded pillowcases—become blank canvases for bold designs. Let me show you how to turn “meh” into magnificent.
Upcycling Old Clothes into Art
Last summer, I transformed 12 yellowed crewnecks into sunset-hued masterpieces using a simple crumple tie method. The key? Embrace imperfections. Stains become texture under layers of cerulean and magenta dye.
| Project | Materials | Result |
|---|---|---|
| Denim Revival | Old jeans, indigo dye | Vintage-look fade |
| Sneaker Makeover | Canvas shoes, spray bottles | Custom streetwear |
| Curtain Refresh | Cotton drapes, the bucket dye bath | Boho-chic accents |
Sustainability expert Dr. Lena Choi notes:
“Upcycling reduces textile waste by 73% compared to buying new.”
Try these DIY hacks for instant impact:
- Dip-dye tote bag handles for pop-color accents
- Use rubber bands on pillowcases for organic patterns
- Layer colors on shirts using the ice-dye technique
My go-to fabric revival process: soak items in vinegar solution first. This helps dyes adhere better to worn fibers. Even a basic white tee becomes gallery-worthy with strategic folds and neon hues.
Ready to redefine “trash to treasure”? Grab those orphaned socks and let’s make magic.
Quick Video Tutorials and Visual Demonstrations
Watching dye spread across fabric taught me more than any written guide. When I first struggled with uneven spirals, a 90-second clip revealed the wrist twist I’d been missing. Now I curate video resources that turn confusion into “aha!” moments for crafters.
Step-by-Step Demonstration Videos
My favorite tutorials break down complex folding methods frame by frame. For example:
- Spiral patterns: Rotate fabric clockwise while applying pressure
- Crumple techniques: Shake bundles before dyeing for organic textures
- Mandala designs: Use chalk guides for symmetrical sections
Textile educator Dr. Elena Moss emphasizes:
“Visual learners retain 75% more technique details compared to text-only instructions.”
Leveraging Social Media for Fresh Ideas
Platforms like Instagram and YouTube burst with innovative designs. I follow hashtags like #ModernTieDyePatterns to discover:
| Platform | Content Type | Benefit |
|---|---|---|
| YouTube | Full process videos | See timing nuances |
| TikTok | Speed tutorials | Learn quick hacks |
| Pattern galleries | Save color combos |
Try screen-recording your favorite process clips for offline practice. Engage with creators through comments—many share exclusive tips when asked politely. Remember to tag your own projects using #DyePatternsGuide to build a portfolio.
Troubleshooting Common Tie Dye Challenges
Even seasoned crafters face color bleeding issues when experimenting with vibrant patterns. I’ve ruined countless projects before discovering simple fixes that preserve crisp lines and bold contrasts. Let’s tackle the most frustrating problem—unwanted dye migration—with proven solutions.
How to Prevent Color Bleeding
Pre-soaking fabric in soda ash remains non-negotiable. This step creates a chemical bond that locks pigments in place. During my first ombre attempt, skipping this caused blue and yellow to merge into a murky green mess.
Three methods revolutionized my results:
| Method | Purpose | Tip |
|---|---|---|
| Soda Ash Soak | Strengthens dye adhesion | Use 1 cup per gallon of water |
| Dye Ratios | Controls saturation | Mix 2 tsp powder per 8 oz water |
| Band Placement | Defines sections | Double-wrap edges |
Textile expert Mia Sato advises:
“Apply techniques like pinch small folds for intricate areas—tight creases resist bleeding.”
Rinse projects in cold water until it runs clear, usually 10-15 minutes. I learned through the trial that rushing this process smears half-set pigments. For small sections, use squeeze bottles with narrow tips to target precise zones without overspilling.
Embrace minor imperfections—they add character. With these adjustments, your designs will maintain sharp, gallery-ready patterns that turn heads.
Conclusion
Through crumpled folds and swirling hues, we’ve explored how simple techniques transform plain shirts into vibrant masterpieces. My own experiments—from splotchy first attempts to crisp mandala designs—taught me that preparation fuels creativity. Remember: pre-washed fabric and strategic rubber bands make colors pop.
Whether revamping thrifted finds or crafting new pieces, each diy project offers surprises. Reference video tutorials when trying advanced patterns, and don’t fear color bleeds—they often give unique results. Textile artist Jamie Rivera wisely notes:
“The best guide is your willingness to play.”
Grab your squeeze bottles and embrace the mess. Share your boldest tie dye creations online using #ColorExplosion—I’d love to see your twists on spiral and ombre patterns. Every splatter tells a story, and yours starts today.
FAQ
What materials do I need to start a project?
You’ll need fabric dye (like Rit or Tulip), rubber bands, gloves, squeeze bottles, and natural-fiber fabrics like cotton. Pre-wash fabrics to remove coatings that block color absorption.
How do I prevent colors from bleeding?
Use cold water rinses first, and avoid over-saturating the fabric. Let the design set for 6–8 hours before washing. Synthrapol detergent helps lock pigments in place.
Can I create crisp stripes without professional tools?
Yes! Accordion folds with tight rubber bands keep lines sharp. Try using washable markers to sketch guides before folding. Brands like Jacquard sell precision applicators for cleaner edges.
What’s the secret to vibrant ombre effects?
Gradually dilute dye in separate bottles for smooth transitions. Dip-dye vertically, moving from dark to light shades. Dharma Trading Co.’s Procion MX dyes blend beautifully for gradients.
How do I fix mistakes after applying pigments?
Rinse the area immediately with cold water. For stubborn spots, apply a bleach pen (like Clorox) sparingly. Let dry completely before re-dyeing.
Are Shibori patterns difficult for beginners?
Start with simple folds like the kumo (spiderweb) or itajime (shape-resist). Use wooden blocks or clamps for symmetry. Practice on small swatches before tackling larger pieces.
Can I reuse old clothes for these projects?
Absolutely! Cotton tees, denim jackets, or linen curtains work best. Avoid synthetic blends—they don’t hold pigments well. Thrifted items from brands like Hanes or Levi’s are great for upcycling.
What’s the best way to set dye long-term?
Heat-set with an iron or dryer after rinsing. For extra durability, soak fabrics in a vinegar-water solution (1:4 ratio) before dyeing. This works wonders with fiber-reactive dyes like Jacquard’s.
How do I achieve a bullseye pattern without smudging?
Pinch the fabric’s center tightly and spiral outward. Secure with rubber bands in sections. Apply colors in a clockwise order, using thicker dye mixtures to prevent running.
Where can I find video tutorials for advanced techniques?
Check YouTube channels like Tie Dye Your Summer or Dharma Trading’s official page. Instagram Reels from artists like @tiediyetuesday offer bite-sized demos for mandalas and chevrons.
Tie Dyeing isn’t just for Hippie style t-shirts anymore, it’s become a widespread activity of choice for anybody looking to do something both fun and easy. Here we outline some different tie dye ideas and options.
Tie Dyeing Isn’t Just For T-shirts
The all-cotton t-shirt is the typical medium for first-time tie dyers but it’s no longer the only option for people who want to creatively color different garments or even home linens and decor items. You can tie dye for unique gift items, various items to sell, clothes for personal use,and items around the home.
Here are just some of the available tie dye gift ideas to try:
fabric book covers
fabric covered cards
covered boxes
scrapbooking inserts
handkerchiefs / bandanas
cosmetic bags
fabric eyeglass cases
Home decor is also an area where tie dye can be used in many ways to add a splash of color. Different things you can tie dye for the home are:
couch cushion covers
couch and love seat covers
curtains
fabric and paper wall paper
shower curtains (the cotton side of the double layered kind)
fabric panel partitions
table cloths
bed linens and many more
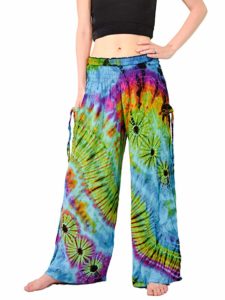
These Tie Dye Yoga Pants can be purchased from Amazon
Clothing items are available now that you can get from tie dyeing suppliers as well as regular retail clothing store outlets that sell white cotton, silk, linen, hemp, rayon or jute garments.
You can buy:
tank tops
jersey dresses
pajamas
shirts
shorts,
hoodies
vests
sweaters
baby dolls
jumpers,
and even lingerie
to tie dye in whatever pattern and colors you have in mind.
The good thing about all these tie dye ideas is that with the ease of tie dye production and the variety of objects that can be tie dyed, if you want to start selling tie dyed goods you can easily build an inventory of different items to sell.
TieDyeInstructionsManual.com a participant in the Amazon Services LLC Associates Program, an affiliate advertising program designed to provide a means for sites to earn advertising fees by advertising and linking to Amazon.com,
Links on this tie dye ideas page are sponsored affiliate links and the owner makes a commission if you buy after clicking these links. The owner is not a bona-fide user of these tie dye ideas products. However, he has thoroughly researched it and provided a personal opinion only. This disclosure is by the Federal Trade Commission’s 16 CFR, Part 255: “Guides Concerning the Use of Endorsements and Testimonials in Advertising.”