Basic Tie Dye Instructions Manual
Tie Dye Instructions: Step-by-Step Guide for Perfect DIY Results
People of all walks of life and of all ages can now learn to tie-dye cloth and various clothing items as a creative hobby or pastime. This has been made all the easier with the availability of online, written, or DVD tie-dye instruction materials.
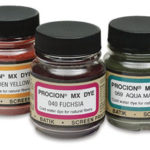
 The best dyes to use when tie-dyeing are fiber-reactive dyes such as Procion MX Dyes. It’s best not to use the more commonly available Rit dyes. These aren’t as permanent and will need to be allowed to ‘set’ and simmer in the fabric for 30 minutes for each separate color.
Video: Tie Dyeing With Jacquard Procion Dye
Procion fiber reactive dyes, however, only require that you to use them at room temperature (between 70 – 100 F). They need to ‘set’ by letting the piece of fabric or freshly dyed clothing to remain damp with the dye for around 24 hours. Or longer depending on how strong you want your colors to be..
Tie Dye Instructions – Learning to Tie Dye
 Learning how to tie dye is both quick and simple. There are 5 steps in any tie dyeing process, but remember to put on your safety equipment (goggles, rubber or latex gloves, and, a good quality face mask) before using the sodium carbonate.
1. Prepare your natural fiber fabric (cellulosic fiber – no wools or protein-based fiber apart from silk) by washing or soaking it in a sodium carbonate solution to prepare the material to take the dye colors.
2. Mix your Procion MX Dye powders with just a little water (as recommended in the package’s instructions) to produce a dye concentrate for easier control/different effects and usage. You can, of course, make a regular dye solution with the full amount of water along with the correct amount of sodium carbonate if you’d prefer.
Implement Techniques
3. Implement whichever tie dye techniques you’d like to use following the tie dye instructions from your online, book or DVD/video source. Carefully tie your fabric or garment in the way required to achieve the effect you’re looking for using rubber bands, dental floss, or other strong thin string.
4. Apply your chosen dye colors, store your article in an airtight container or ziplock-style bag, and, let the dye set for at least 24 hours
5. Wash out excess dye with cold water, and wash again twice more with a hot water wash cycle (using Synthrapol to keep the colors separate), followed each time with rinsing.
Following these basic tie dye instructions and experimenting with simple tie dye techniques will help you discover just how easy and fun tie dyeing can be.
The technique of tie dye makes a comeback every so often and it never loses its symbolic free-spirited, individuality through tie dye’s unique designs.
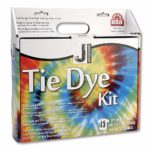
You can buy kits of several colors and they come with applicator bottles to make your job even easier.
Simple Tie Dye How-to: Follow These Steps for Colorful Results
What if I told you your plain white shirt could transform into a vibrant masterpiece in just a few steps? I’ve spent years experimenting with patterns and professional techniques, and today, I’m sharing my foolproof method to help you create bold, lasting designs. Let’s dive in!
I first tried this craft, I worried about messy results or fading colors. But trust me—once you grasp the basics of how fabric interacts with dye, the process becomes effortless. My guide breaks down every step, from choosing supplies to rinsing your creation, so you’ll avoid common pitfalls.
I’ll walk you through selecting the right materials, prepping your shirt, and applying colors like a pro. Whether you’re revamping old clothes or crafting gifts, these easy-to-follow strategies ensure success. Ready to unlock your creativity?
Key Takeaways
- Learn professional tie dye methods used by trusted sources.
- Understand how fabric type impacts color absorption.
- Follow a step-by-step process for vibrant, long-lasting results.
- Discover essential prep work to avoid bleeding or fading.
- Gain the confidence to customize shirts and other fabrics.
Gathering Your Supplies and Preparing Your Workspace
Before your fabric transforms, let’s organize your tools. I’ve learned through trial and error that proper prep separates messy attempts from gallery-worthy pieces. Here’s what you’ll need to set yourself up for success.
Essential Tools and Materials
Start with thick rubber gloves—they’re non-negotiable for keeping hands stain-free. My go-to kit includes pre-measured soda ash and urea, which help colors bond to fabric. You’ll want multiple squeeze bottles for different hues and thick rubber bands for creating crisp patterns.
Don’t skip the plastic sheeting. I once ruined a kitchen counter by thinking “I’ll be careful.” Now I always cover my work surface with a waterproof layer. Pro tip: Use disposable containers for mixing dyes to simplify cleanup.
Setting Up a Safe and Clean Work Surface
Choose a flat area with good ventilation. Lay down that plastic sheet first, then gather your kit components within arm’s reach. Keep a bucket of water nearby for rinsing tools—it prevents dried dye from hardening on brushes.
Organize your supplies like a painter’s palette: dyes on one side, binding tools on the other. This workflow prevents color contamination. Remember, efficiency matters when working with time-sensitive materials!
Selecting the Right Fabric and Prepping Your Shirt
Your fabric choice makes or breaks the final result. Through years of testing, I’ve found that 100% cotton outperforms blends every time. Natural fibers absorb color deeply, while synthetics like polyester resist bonding.
Choosing the Best Cotton Fabrics
Look for tight weaves in shirts—they hold patterns better than loose knits. Cheap cotton blends might save money upfront, but they’ll leave you with muddy colors. Premium fabrics with higher thread counts give sharper definition between hues.
Quality matters more than you think. Bargain-bin tees often have chemical coatings that block dye absorption. I always check labels for “100% cotton” and avoid anything labeled “wrinkle-resistant.”
Pre-Washing and Soda Ash Soak Basics
New shirts come with sizing—a starch coating that repels liquids. Wash them in hot water without fabric softener first. This step removes factory residues so your base becomes a blank canvas.
Mix 1 cup of soda ash per gallon of warm water for the soak. Submerge shirts for 15 minutes, then wring them out until damp. This alkaline solution opens fabric fibers, letting colors latch on permanently. Don’t skip this—it’s the secret to vibrant results that last through washes.
Pro tip: Use separate containers for soaking if working with multiple shirts. Reuse the solution until it cools completely to save materials.
Essential Tie Dye Instructions
Creating vivid patterns starts with mastering your materials. The right dye powder and mixing method determine whether colors pop or fade. Let’s break down the science behind vibrant hues.
Understanding Dye Powder and Mixing Techniques
Procion MX dye powders work best because they bond chemically with fabric. I always combine three components: warm water, urea, and soda ash. Urea acts like a color booster—it helps dissolve the powder evenly.
| Component | Purpose | Ratio |
|---|---|---|
| Dye Powder | Base color pigment | 1 tsp per 8 oz water |
| Urea | Prevents clumping | 2 tsp per mixture |
| Soda Ash | Activates bonding | 1 tbsp per cup |
Here’s my step-by-step process for lump-free liquid:
- Add powder to warm water (not hot—it weakens color)
- Stir in urea until fully dissolved
- Mix soda ash separately, then combine
“Precision matters more than speed. Rushed mixing leads to patchy results.”
Store your mix in squeeze bottles for easy application. Shake each bottle before use to reactivate the dye. Pro tip: Label containers with color names to avoid confusion later.
Step-by-Step Dye Application and Pattern Techniques
The magic happens when your hands shape the fabric into vibrant art. I’ll show you how to turn folded cloth into eye-catching designs using simple tools and a dash of creativity. Let’s transform that blank canvas into something extraordinary.
Binding Techniques for Unique Patterns
Start by twisting sections of your damp shirt and securing them with rubber bands. For spiral designs, pinch the center and rotate clockwise until the fabric resembles a cinnamon roll. Crumple techniques work best for organic, unpredictable patterns—randomly scrunch the material before binding.
I always use thick bands to prevent slipping. Place them closer together for smaller color segments or farther apart for bold streaks. Pro tip: Mark binding points with chalk if you want symmetrical results.
Applying Dye with Squeeze Bottles and Brushes
Load your squeeze bottles with mixed colors and start from the center of each bound section. Apply gentle pressure to saturate the fabric fully. For gradients, layer similar colors (like turquoise and navy) from dark to light.
Brushes excel for precise details. Dip a flat brush into the liquid dye and stroke outward from the bands. Let each color set for 5 minutes before adding the next to prevent muddy blending. My go-to combo? Fuchsia paired with lemon yellow creates electric contrasts.
“Patience separates hobbyists from artists. Let the fabric drink the color before moving on.”
Work in 15-minute intervals to keep dye colors from drying too fast. Rotate the shirt to ensure even coverage. Remember: The tighter the bands, sharper the lines. Looser binds create softer, watercolor-like effects.
Setting, Waiting, and Washing for Vibrant Results
Patience now pays off in lasting brilliance. After applying your design, the next 24 hours determine whether colors stay vivid or wash down the drain. I’ve ruined projects by rushing this phase—learn from my mistakes.
Optimal Wait Times and Setting the Dye
Seal your creation in a plastic bag for a full day. This gives dye molecules time to bond with fabric fibers. Cold rooms? Extend to 36 hours. Warm spaces? Never dip below 18 hours—I set phone reminders to track this.
When unwrapping, wear gloves. Rinse under warm water for 5 minutes, gradually cooling it. This temperature shift locks color while removing excess pigment. Squeeze gently—never wring—to preserve pattern integrity.
Effective Rinsing and Post-Dye Care
Load your washing machine alone. Use Synthrapol detergent—it grabs loose dye particles others miss. Select the “heavy duty” cycle with warm water. This initial washing prevents bleeding onto other clothes later.
My rinse checklist ensures everything needs attention:
- Inspect seams and folds for trapped pigment
- Run fingers through the fabric while rinsing
- Repeat until water runs clear
Air-dry away from direct sunlight for 48 minutes before wearing. This final work session guarantees your colors stay sharp through 50+ washing machine cycles. Follow this way, and you’ll make sure your art outlasts fast fashion.
Conclusion
Watching plain cotton transform into wearable art never gets old. Through years of testing, I’ve found success comes down to three non-negotiables: quality materials, precise techniques, and patience during curing. Each step—from soaking in soda ash to strategic binding—builds toward those eye-popping results.
Natural fabrics paired with professional-grade dyes create lasting vibrancy. Those tight rubber bands? They’re not just tools—they’re pattern architects. Remember to rinse thoroughly in cool water before unveiling your masterpiece.
Your finished shirt deserves proper care. Wash separately for the first five cycles using cold water and color-safe detergent. Store folded to maintain crisp lines between hues. Now’s the time to experiment—try spiral layouts or gradient blends using your kit’s remaining colors.
Trust this process. I’ve seen beginners create gallery-worthy pieces by following these methods. Grab your supplies, clear a work surface, and let the colors flow. Your next favorite wardrobe staple is waiting to bloom.
FAQ
What fabrics work best for vibrant results?
I recommend 100% cotton or natural fibers like rayon. These materials absorb dye effectively, ensuring bold colors. Avoid synthetic blends, as they resist pigments and create muted tones.
Why should I use soda ash before applying dye?
Soda ash opens fabric fibers, allowing the dye to bond permanently. Without it, colors fade faster. Always soak your garment for 15-20 minutes and wring it out before binding.
How long do I let the dye set for maximum intensity?
I wait 6-8 hours minimum. For deeper saturation, leave it wrapped in plastic overnight. Heat helps—store dyed pieces in a warm spot or use a portable heater nearby.
Can I mix different dye colors directly on the fabric?
Yes! Overlapping hues create custom shades. Layer primary colors strategically—like yellow under blue for green accents. Test combinations on scrap fabric first to avoid muddy results.
What’s the safest way to rinse after dyeing?
I rinse under cold water until it runs clear, then gradually increase the temperature. Use gloves to prevent staining. Machine wash separately with Synthrapol detergent to remove excess pigment.
How do I prevent colors from bleeding during washing?
Soak dyed items in a vinegar-water solution (1:1 ratio) for 30 minutes before the first machine wash. This locks pigments in place. Always wash with similar colors initially.
TieDyeInstructionsManual.com is a participant in the Amazon Services LLC Associates Program, an affiliate advertising program designed to provide a means for sites to earn advertising fees by advertising and linking to Amazon.com.
Links on this tie dye instructions manual page are sponsored affiliate links, and the owner makes a commission if you buy them after clicking these links. The owner is not a bona-fide user of this tie dye instructions manual product. However, he thoroughly researched tie dye instructions and provided only a personal opinion. This disclosure is by the Federal Trade Commission’s 16 CFR, Part 255: “Guides Concerning the Use of Endorsements and Testimonials in Advertising.”
Vibrant Tie Dye Instructions | Procion MX Dyes
Easy tie dye instructions for using Procion MX Dyes. Watch the video at the Tie Dye Manual. MORE INFO HERE.
Product Brand: Procion
Product Currency: USD
Product In-Stock: InStock
5